
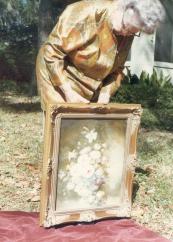
What's wrong with this picture? A lot: direct sun glare, too far away, position at an angle, and a mixed background. |
Tips on Photographing Oil Paintings (for Fellow Amateurs) |
Taking a respectable photograph of an oil painting is a bit tricky, but you can do it -- even with your pocket camera. Three things matter most: lighting, position and a steady camera. Lighting. Assuming you are using a color print film (daylight type), then you should hang or stand the painting up where there is strong, even, natural light, but never in direct sunlight! Direct sun can produce harsh contrast and glare on the painted surface. For the same reason, don't use your camera flash as the primary light source either. (Always turn your flash off if possible.) For the best natural lighting, work outdoors on a cloudy day or in open shade. If your camera meters the exposure automatically ( and most do), make sure you move in close until the painting barely fits within the camera viewfinder. That way your meter won't be fooled by a lighter or darker background, and your photo will have better color and detail. If you have to take the photos indoors, avoid artificial lighting, especially fluorescent, unless you can can use the proper color-compensating filter on your camera. A polarizing filter will also help to reduce glare. Ask an expert about filters. If you can take photos indoors near a high window or under a roof skylight, that's easier. But be careful where your shadow falls! Position. First, get your painting positioned for good, natural lighting. Hanging it at eye level on a shaded outdoor wall may be ideal. Then you will need to position your camera so that it points straight at the middle of the painting. If you lean the painting against something, your camera should be pointing downward at the same angle. Try to make the background a uniform, contrasting tone so that you can see the edges of the painting well. A background approaching black or white is perfect. If necessary, you can hang a piece of fabric or paper behind the painting. The important thing again is to focus in until the painting just fits within the viewfinder. Then adjust your camera position until all four sides of the painting are parallel to the inner borders of the viewfinder. You may need to rotate your camera a quarter turn to make the painting fit better. All of these lines will be parallel ONLY when your camera is positioned right. It just takes a little extra care. Steady Camera. Even great cameras will take lousy pictures if they aren't steady when you press the button. If you have a tripod for your camera, you should definitely use it. If not, then practice a steady hand and use 400 speed film for clearer photos. Always take 3 or 4 shots of each painting and choose the best print. You may be surprised at how much they vary in quality. If you happen to use a digital camera, then of course you can inspect the results then and there. Always take digital photos at the highest resolution setting. Whether or not you want to feature your "guest" painting on the M. Vann Elliott web site, it's still important to take good documentary photos for your family album and for insurance purposes. |
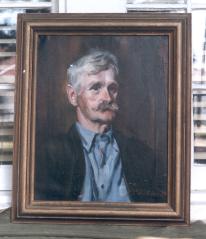
Not a bad outdoor photo, but the sides are not quite parallel. That indicates faulty camera position. |
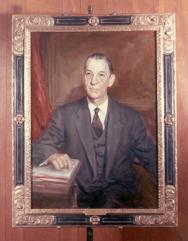
Good camera positon, but blurry (shakey camera?), and artificial lighting caused the greenish tint. |
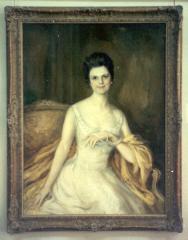
Decent position and clarity, but indoor lights distorted colors a little, and the background tone is too similar. |